


Microsoft Office 365 is a cloud-based service that allows users to store data in the cloud and help users to access data from anywhere. This is why many users are considering opting for Office 365. It includes services like SharePoint Online, Exchange Online, and Skype for Business, etc. while accessing data online, it is convenient that emails can be prone to vulnerabilities. However, there are many reasons why Office 365 emails are prone to the risk of losing data. A situation can arise where users might not be able to access their emails. Therefore to deal with all unwanted situations, users consider backup Microsoft 365 emails in Outlook PST because PST files are easy to access. Now you need an answer to the question of how to backup emails. To know about the best solution for emailing backup read the following blog carefully.
Why to backup Office 365 emails-:
- There are plenty of reasons why users consider having a backup of Microsoft 365 emails, and some of them are mentioned as follows-:
- Sometimes due to accessibility of mailboxes can lead to chances of corruption; hence to reduce the size of mailboxes, users carry out Office 365 mailbox backup tasks.
- As Office 365 is a cloud-based service, it is universally accessible; thus, there are always chances of unauthorized access and hacking.
- Accidental deletion plays a significant role in executing Office 365 mailbox backup tasks because if a user accidentally deletes any mailbox, then they realize it can be important for an organization. Hence to retrieve the mailbox, users decide to have a backup.
Methods to perform the backup task-:
Users can back up Microsoft 365 emails either by manually method or with a third-party tool. Before deciding, let’s know in detail about both methods. Below there is a discussion of the manual method.
Backup Office 365 to PST via Manual method-
E-Discovery Method
- With the administrator credentials, log in to Office 365.
- Go to Admin>Exchange.
- Now, from the left panel, click on Permissions, then go to Admin Roles>> Discovery Management.
- Click on the (+) sign to add roles.
- Click on the “Mailbox Import/Export” below the Roles.
- Select the (+) sign under “members” and click once on the user’s name.
- After completing all the steps, click on save.
- Follow “Compliance Management>>in place eDiscovery and hold” and click on the New button.
- Type the name and click on Next.
- Click on “Search all mailboxes” to select a mailbox or to select one mailbox by using the “Specify Mailboxes to Search” option and adding the (+).
- Select and apply the Filter option and then click on the next button of the “Search Query” screen.
- A dialogue will open “In-Place Hold Setting,” now, you can select the number of days until the items are kept before they are deleted from the server.
- Click on the “Finish.”
- Next, after receiving the confirmation of the message, click on the close message.
- After completing the whole process, all generated searches will be listed. Next, users can click on the down arrow to export the PST file.
Limitations of the manual method-:
- This method is complicated and consumes a lot of time for users to back up Microsoft 365 emails.
- The manual method does not back up selective data such as emails, contacts, or calendars.
- You have to be an expert in the technical field to perform the Office 365 mailbox backup task manually; otherwise, users can lose data.
Third-party application to execute the backup task-:
To save you extra effort and time, the best way to back up Microsoft 365 emails is to use a third-party application, and the best Office 365 email backup software is Shoviv Office 365 Backup Tool. It provides a fast and accurate backup. Have a look at what it facilitates:
- The user–friendly GUI of the Shoviv Office 365 backup software makes the task easy for technical and non-technical users.
- It provides the complete backup of User mailboxes, Archive Mailboxes, Public Folder, etc.
- With an advanced feature like Incremental export, users can resume the task from the last interrupted point, and it will also prevent data from duplicity.
- Shoviv Office 365 email backup software allows users to schedule backup jobs periodically by choosing the option daily, weekly, and monthly.
- The software maintains the originality of data and hierarchy of folders which makes the Office 365 mailbox backup task more efficient and secure.
- To filter your data, users can opt for the filter option, which will help you exclude the undesired items and the desired ones. Therefore it makes the backup Microsoft 365 emails task easy.
- Users can select a time b/w 2 to 30 minutes while downloading large-sized items. So that they can get rid of a long time stuck on a single large-size item.
How does Shoviv Office 365 Backup and Restore Work?
The steps to backup Microsoft 365 emails are as follows-:
Step 1- Install and launch the software.
Step 2- To connect Office 365 user mailboxes, you have to create a project, and from connect, Office 365 tab click on the connect button and fetch the users mailbox.

Step 3- Now, in the dialogue box, enter the details of Office 365 admin and click connect.

Step 4- From the backup directory tab, click on the add icon and create a backup directory to store Office 365 backup mailboxes.
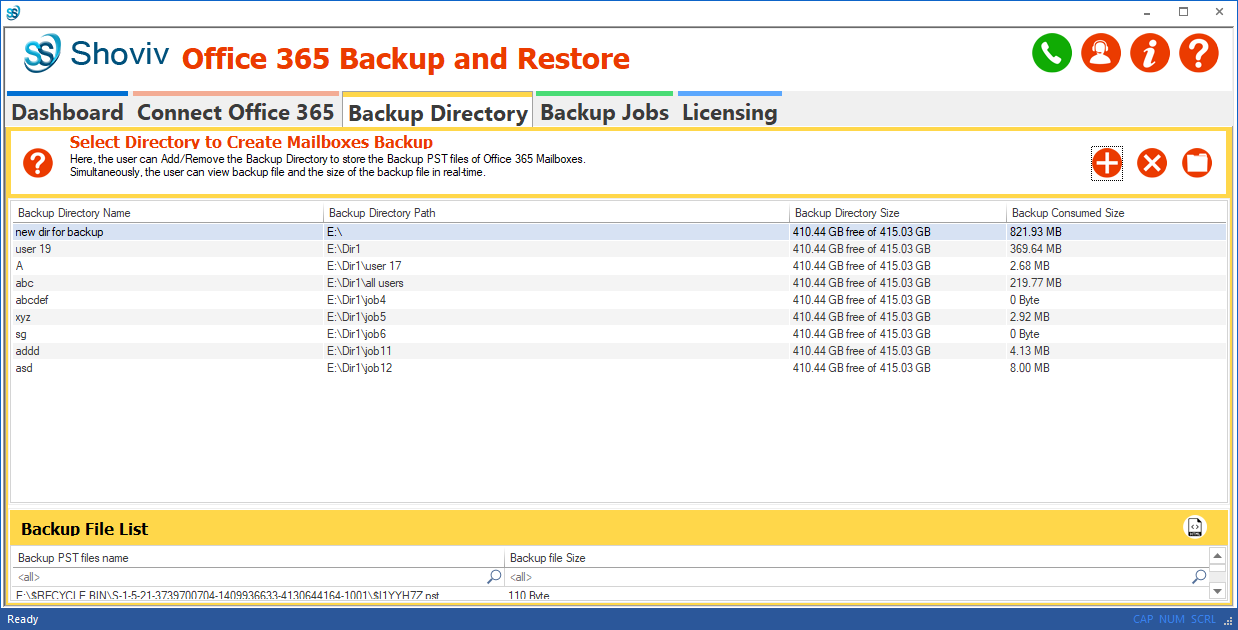
Step 5- Now provide the directory’s name and browse the directory/folder path where you want to store the backup files of Office 365 mailboxes.

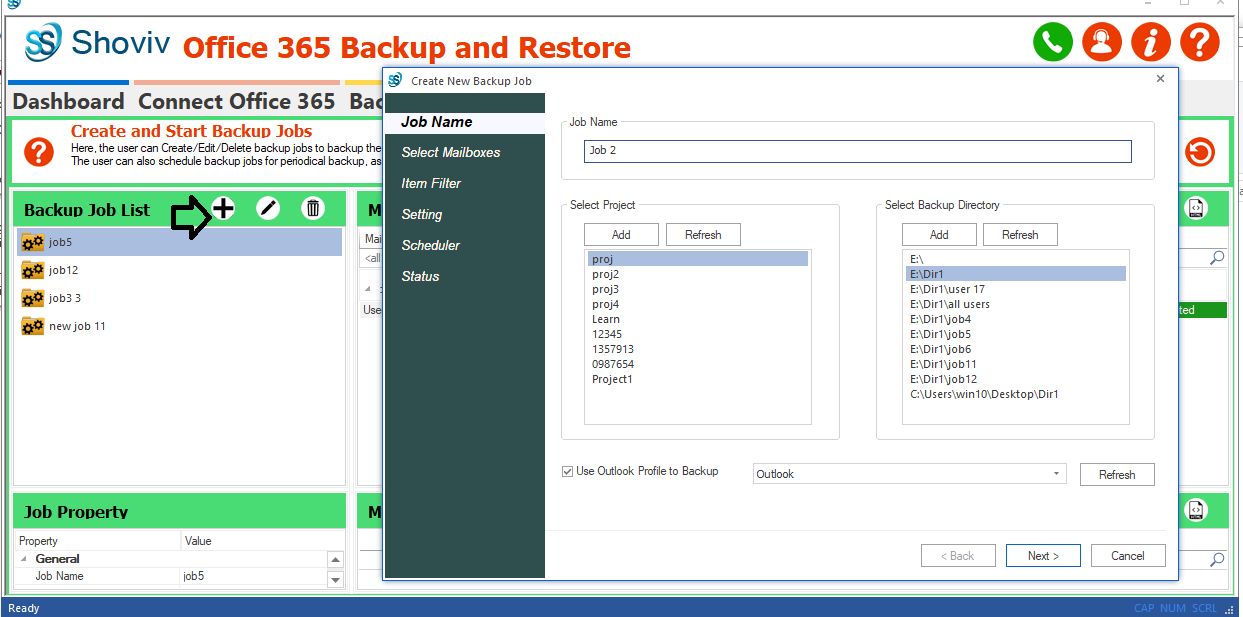
Step 6- Next, by clicking on the add button of the description toolbar from the backup jobs tab, create a new backup job. Now provide details in the dialogue box and click next.
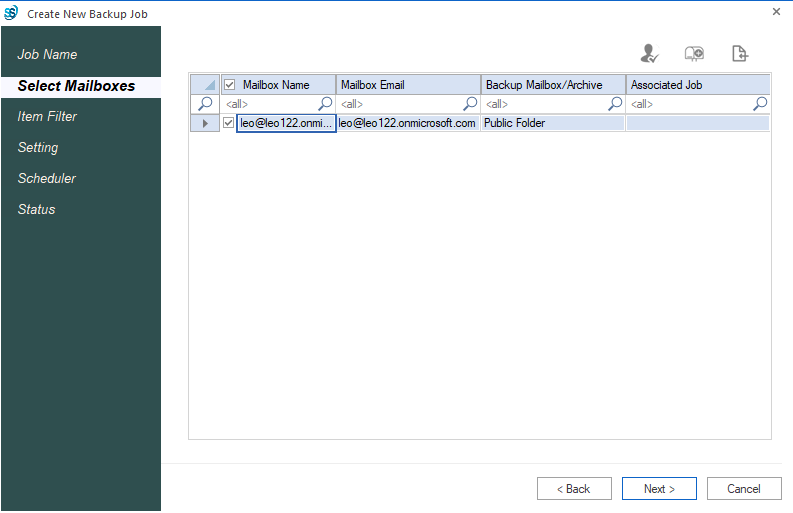
Step 7- Now you can select the mailbox for backup, and there is an option to choose whether the user wants a backup of general mailboxes, archive mailboxes, or both. Click the Next.
Step 8- Filter data by choosing from three options; message class, data range, and folder filter.

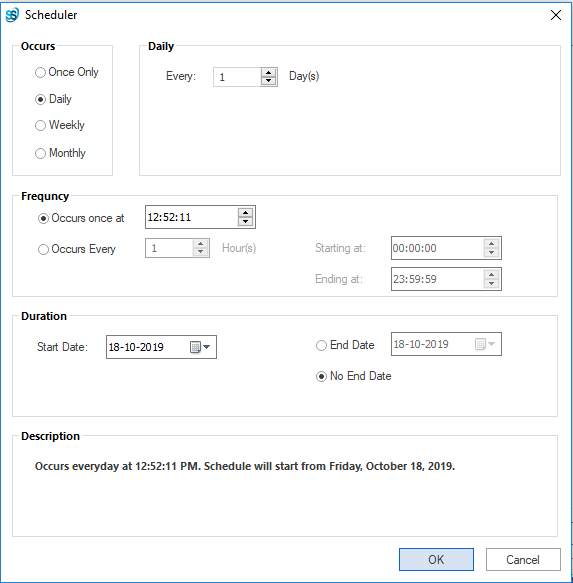
Step 9- Now, in the next window, you have two options; immediate process and applying scheduler. Here user can set a Starting date, Ending date, Frequency, Duration, and occurrence like Daily, Weekly, Monthly, or Once Only.
Step 10- The status of the created backup job will be displayed on this page. If you want, you can save the report and click on Next.
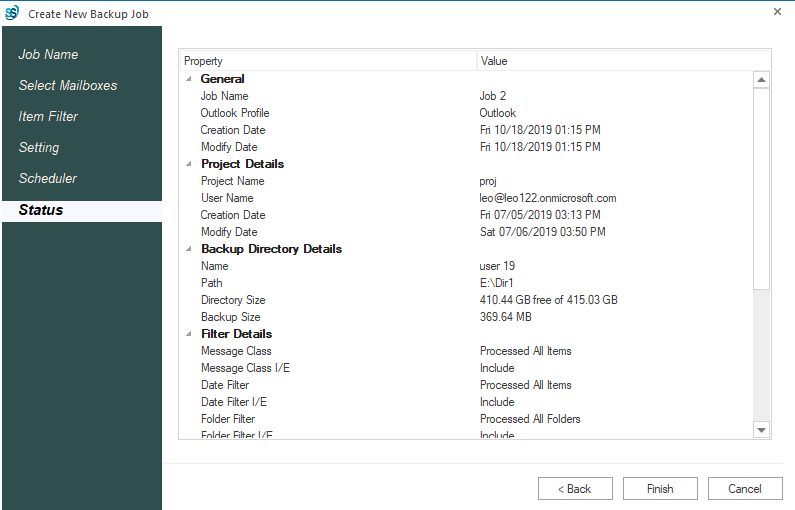
Step11- After clicking on the finish button, the final backup report of the mailbox will be displayed now.

Conclusion-:
All the methods to perform Office 365 mailbox backup task has been discussed, and the whole blog summarizes that, for whatever reason, you have to back up Microsoft Office 365 emails. The best way to do so is to use the best Office 365 email backup software like Shoviv Office 365 Backup and Restore Tool. There are many drawbacks of the manual method, which is why users avoid executing backup tasks manually because the manual method has a risk of losing data, and not a single organization or user can take the risk of losing data.
The software is efficient in working. Hence it smoothly backup Microsoft Office 365 emails. To check the features and working of the software, go to the website of Shoviv and Download the free Demo version, which allows you to process the first 50 items per folder. Along with these facilities, the software provides 24*7 technical support for users.
DISCLAIMER : This and other personal blog posts are not reviewed, monitored or endorsed by Blogjab. The content is solely the view of the author and Blogjab is not responsible for the authenticity of content of this post in any way. Our curated content which is handpicked by our editorial team may be viewed here.


