
How to Draw Vines. Vines are some of the strangest and most complex plants you can find.
Also, check our Penguin Coloring Pages.
This meandering plant can meander across any surface or object, creating beautiful and interesting structures.
This complexity can also make learning to draw vines difficult, leading to difficulty and frustration.
However, it can be smooth with the right guidance! Fortunately, the same guide is in front of you now.
This step-by-step guide to drawing vines will show you how easy and fun it can be to draw these wonderful plants.
Table of Contents
How to Draw Vines
Step 1
The trick to drawing an intricate floor plan like vines is to take it slow, start small and then build from there.
That’s exactly what we will do in this step of our guide on how to draw vines. To begin this design, you can start with two leaves that are close together.
The leaves will be quite small and quite pointed. They will also include spiky lines for veins, making them even more realistic.
Once these two leaves are drawn, we can add the vines to which they will be attached.
These ends are drawn together in thin lines, and another leaf is near the design’s base. So you end up with a curvy tendril coming down from below.
When this step is complete, you are ready for step 2!
Step 2
To further expand the design of your vines, we add more leaves.
These leaves are smaller than the two main leaves you drew in Part 1, and because they are at different angles, they also have different shapes. However, the leaves also have the same vein pattern within them.
They will also be attached to the central stem of the vine the others come from, and once it looks like our reference image, we can move on to the next part.
Step 3
We’ll add another tuft of leaves for this third step of our guide to drawing vines.
These leaves vary from small to large, but they look similar to those you drew.
They have the same number of points with the vein detail inside.
You can add about 5 leaves for this step if you want it to look like our reference image, but feel free to add a few more or fewer, depending on your preference!
Step 4
In this fourth part, we will add more leaves and tendrils to your tendril drawing. Begin this part by drawing three more leaves, connecting two of them with thick lines.
Once these leaves are drawn, we will add some curved lines coming out of this wisp, and these lines curl into a loose spiral at the end.
With this step complete, in the next step, we can add some final touches to prepare you for some amazing colors!
Step 5
In the fifth step of this grapevine drawing guide, you’ll add the final pieces, details, and elements to finish it off properly.
First, draw a thick vine sticking out from the top of the drawing and rotating.
We will glue some little leaves to this vine, and more twisted, spiraling lines will also emerge.
This will round out all of the details in this guide, but be sure to add a few to make it come alive!
Vines often grow and twine around other plants, trees, and garden structures, so you could design something like this to give the vines something to climb up.
You could also design an interesting background for the picture, and this would be a great opportunity to create a wonderful garden scene with more of your favorite plants and flowers.
Step 6
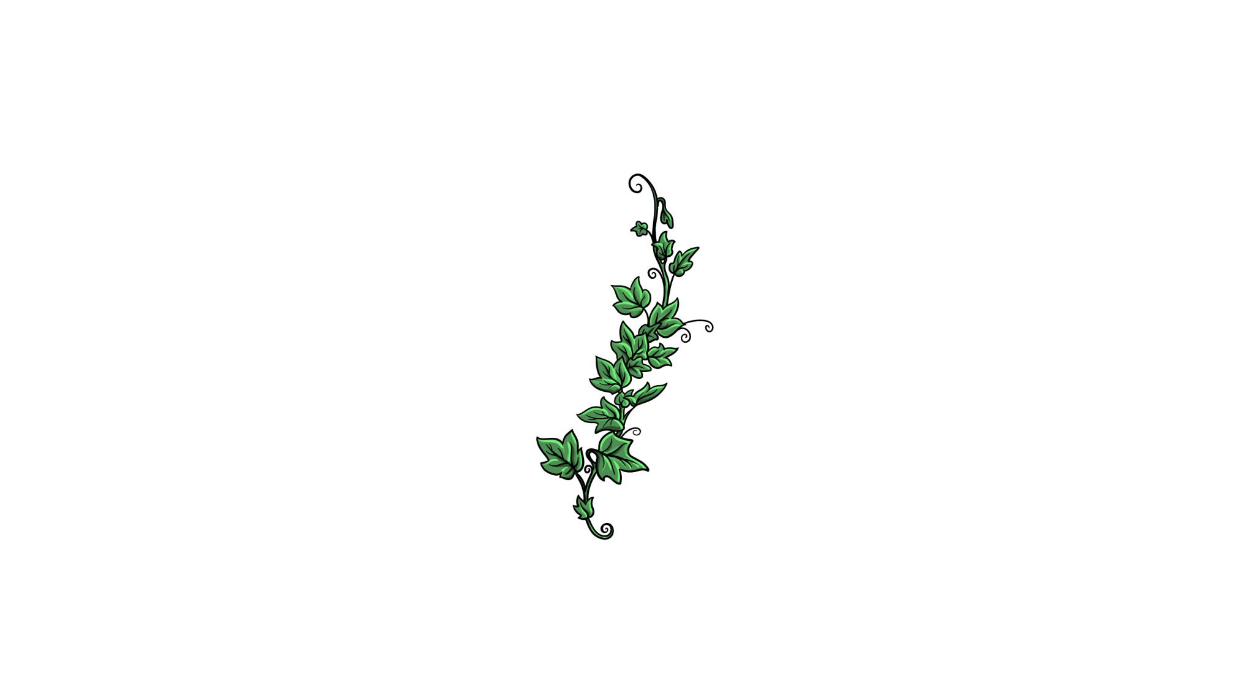
This is the last step of your grapevine design, and for that, you can bring it to life with amazing colors!
We chose different shades of green for the vines for our reference image, but you don’t have to choose those exact colors!
Try a few shades, or even go for a completely different color scheme. If you’ve drawn details or additions to the background, this is a great opportunity to color those.
Once you’ve picked your colors, you can have fun choosing the artistic mediums you use to complete this vine design.
Whether you’re using painting mediums like watercolors and acrylics, or more precise mediums like ballpoint pens and colored pencils, this awesome picture has plenty of ways to color!
DISCLAIMER : This and other personal blog posts are not reviewed, monitored or endorsed by Blogjab. The content is solely the view of the author and Blogjab is not responsible for the authenticity of content of this post in any way. Our curated content which is handpicked by our editorial team may be viewed here.


